How do you cut things out? That’s one of the questions we hear the most. Cutting out an image can be very easy or a bit challenging. A lot depends on the background of your photo and how complex the image is. Today, we’re going to show you the simple way; later this week, we’ll show you the advanced way.
The easy way: the magic wand
The magic wand is magically effective when your background is simple in nature. If the background is one color or monotone or without a lot of complex shading or tones, or if the area you want to cut out has a strong outline that sets it apart from the background (e.g., a logo), you can simply use the magic wand and click on the area you want to copy or the area you want to cut. Once you do that, you’ll see the respective area outlined with a flashing dotted line.
Step-by-step: how to use the magic wand
You’ve got nothing to lose and an undo button with you at all times. So, get going and make it happen:
- Select the magic wand tool from the toolbar.
- Click on an area you want to sample. The magic wand will outline the area selected with flashing dotted lines.
- Hold down the shift key to add more areas to your selection (if needed).
- Hit the delete key or choose Cut from the Edit menu to delete selected areas.
Two examples to get you started
The easiest images to alter are ones like this illustration of the Instructables robot, which is basically a collection of flat colors with very clear outlines. I started by opening a blank, transparent canvas and pasting the Instructables robot into it as a layer. One click with the magic wand, and I’ve selected the entire area outside of the robot. The area selected is outlined with flashing pixels.
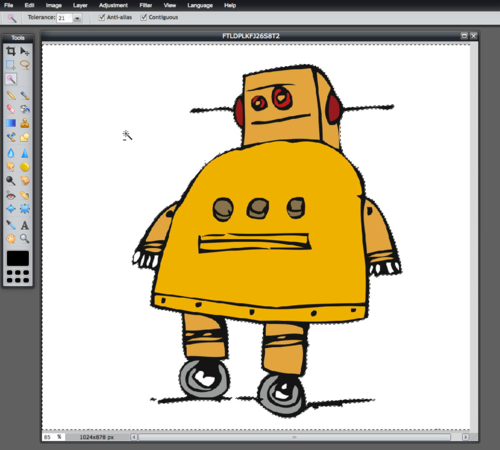
If I choose to cut the area out with a simple “Cut” command, I have the robot all by itself. I could then copy and paste into another image if that’s my goal.

Using the magic wand with shaded backgrounds
Similarly, real-world images like this one that have a relatively simple composition with straightforward shading can be easily cut out. I start with one click of the magic wand:
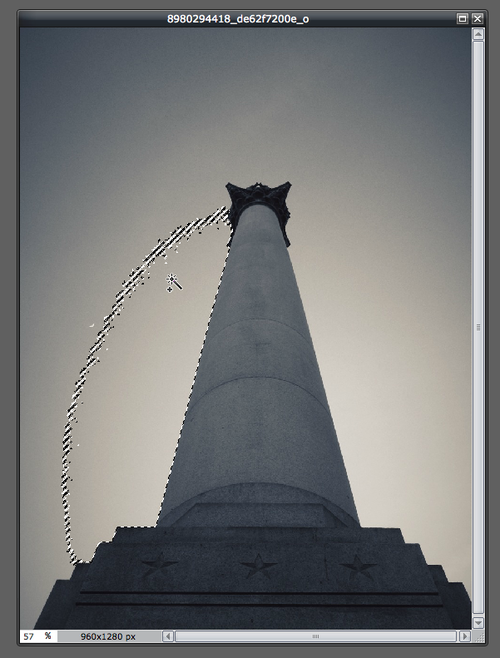
I clicked the sky area outside the monument a few times more while holding down the shift key and was able to select all of the area *outside* of the monument. Initially, the magic wand only picked up some of that sky, but multiple clicks pretty easily got me to the point where I had selected all of it — and isolated the monument.
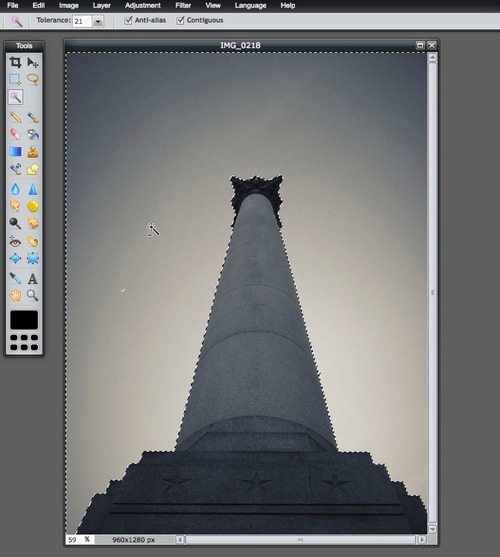
I chose to cut the area I had selected — the area outside the monument — out of the image. Viola. I’ve cut out the monument and isolated it.

A note about transparency
For this second example, I didn’t use a transparent background. If your goal is to cut out an area so that you have a transparent background behind it, remember that you will want to paste your image into a transparent canvas as a new layer *before* you start cutting anything out.
Adjusting the magic wand
What the magic wand is doing is looking at the overall photo and choosing pixels that are similar to the one you’re clicking on. Adjust the tolerance up to make the magic wand select pixels that are even more like the one you’re clicking on. Adjust tolerance down to make your magic wand pickier about choosing the area you want to cut out. Once you begin using the magic wand, you may decide you need to combine additional flashing outline areas to your overall selection. As I did, hold down the shift key as you click to add more areas (pixels) to your selection.
Next time… the advanced way to cut things out
If your image is more complex, the magic wand may not be the tool you want to use. For example, if you want to cut a person out of a photo in a very precise way, you will probably want to use the Lasso tool for more precision in your work. We’ll cover that next week right here on our blog.