
Have you ever wondered how to use your own fonts in Pixlr Editor? Or have you always felt as if the existing choice of fonts available on Pixlr are not enough to satisfy your creative needs?
Well fret not, Pixlr Editor actually supports external fonts! And it’s really easy to expand your library of fonts on Pixlr Editor, just follow the following instructions:
Note: These instructions only apply if you are an OS X or Windows user. You would not be able to use custom fonts on Chromebooks. You can find a detailed explanation here.
1. Go to a font site and download the font you want!

For this tutorial, we will use our sister site TheHungryJPEG’s freebie of the week (because it’s free!), just click here to access it and download it.
2. Install the font on your computer
You can visit either one of these two links to install the font, come back here once you’ve done so:
Follow this tutorial to install the font if you’re a Windows user.
Follow this tutorial to install the font if you’re a Mac user.
3. Restart your browser
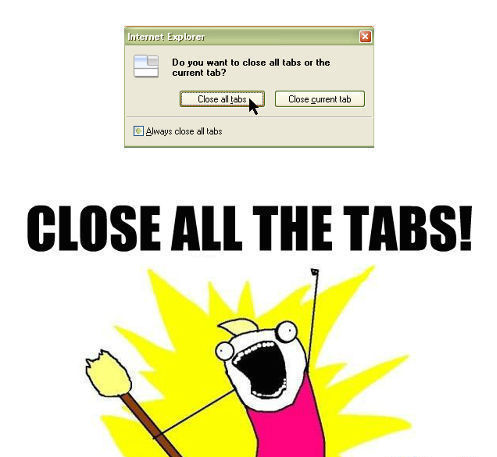
That means turn it off and on again. And yes, that means you close ALL THE TABS, the entire browser has to be turned off and on once more.
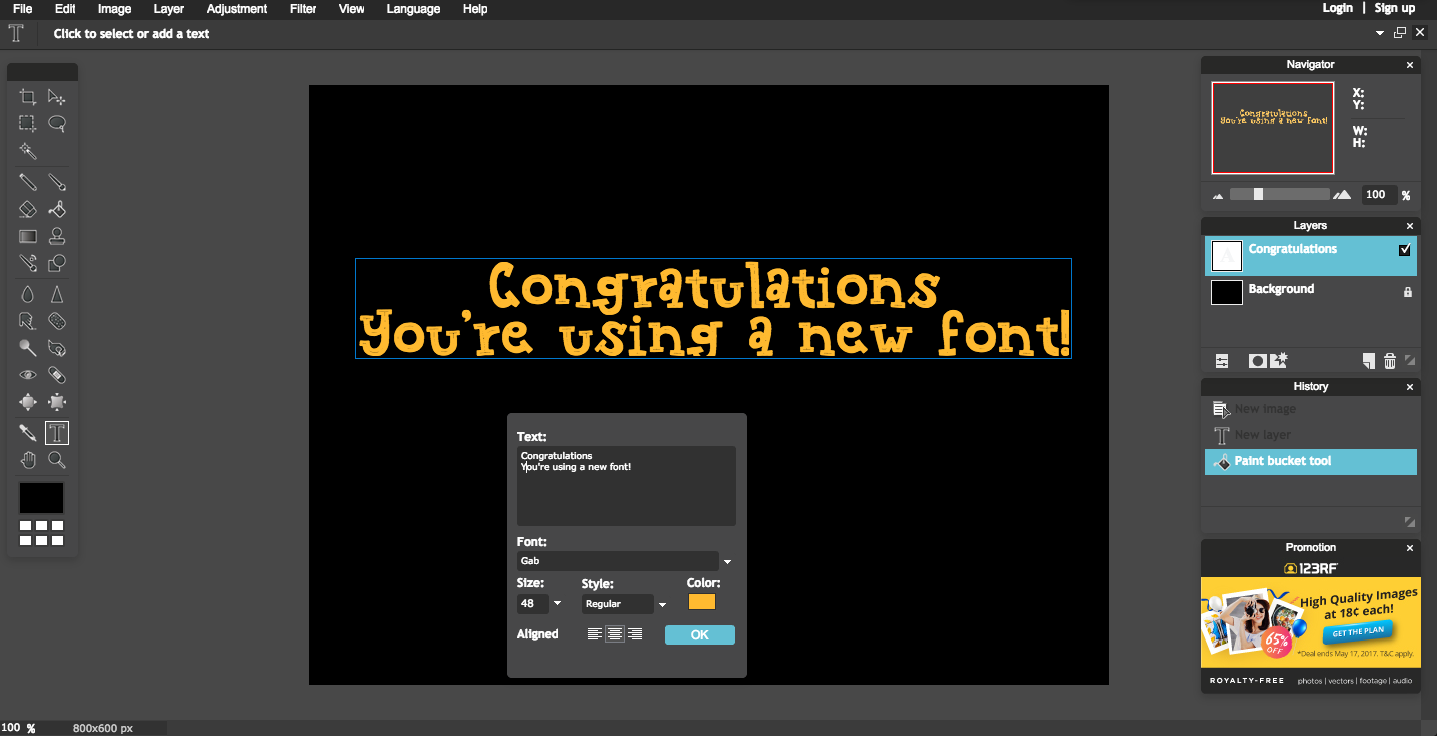
4. Launch Pixlr Editor and test the font!
Click here to launch Pixlr Editor.
Launch Pixlr Editor and select the Text tool, type anything you want and attempt to change the font, you should be able to find your new font in the selection 🙂 If you downloaded Gab like I did it’ll look something like this:
5. Have fun and enjoy your new fonts!
It should work for all fonts, but if they don’t, please feel free to beep us at info@blog.pixlr.com and we will assist you as soon as we can 🙂
