Make a More Gritty, More Intense Portrait with Pixlr Editor
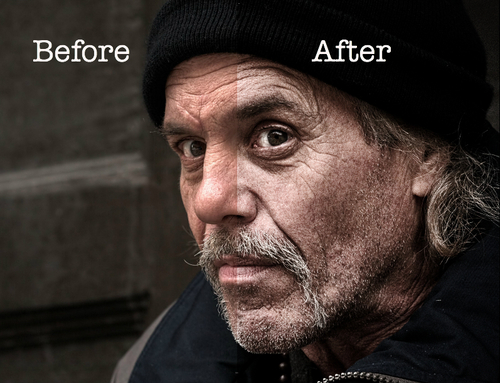
We love grungy street photography, but we don’t always know how to get that look out of just a camera. Here’s a little secret: You usually can’t. Many of the gritty, urban street photos you see have some post-processing work done on them. We don’t think there’s anything wrong with that. In fact, we’re going to show you how to add a little gritty intensity to your portraits using Pixlr Editor.
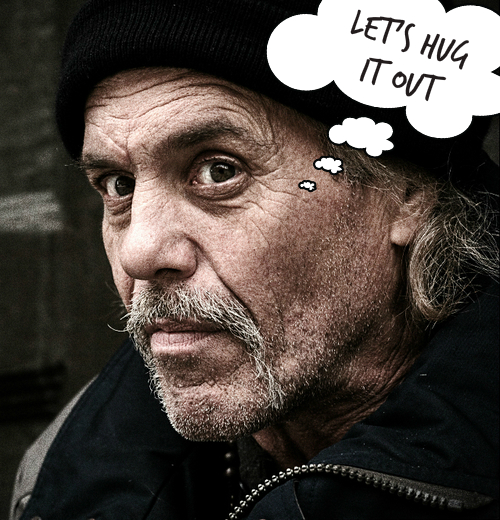
First, of course, you’ll need a portrait. If your portraits subject looks a little menacing to begin with — even better. Ours certainly does:

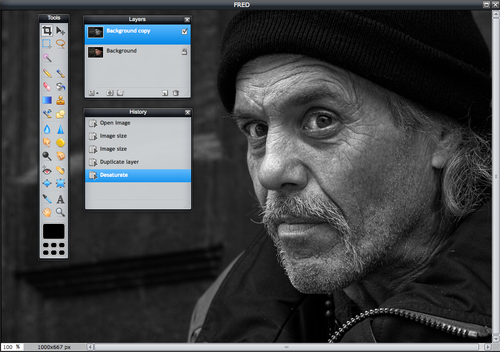
Open your image in Pixlr Editor. You’re going to want to duplicate your background layer. You can do this from the Adjustments menu, or just right click on the layer in the Layers toolbar and choose Duplicate layer. Next, we want to knock out the color in this layer. Choose Adjustments > Desaturate and you’ll see that this will turn your layer into black and white:
Next, we’re going to blend these two layers together. This will add intensity to the photo’s details, but the key to getting this right is controlling the intensity. For our image, we want to dial back the opacity of the added layer to about 80%. Then, we’re going to use one of the layer blending modes to give this layer some additional lighting treatment. You’ll see that you have a number of blending modes to choose from, so try them out to see how each works. We’re using Hardlight, which is what we suggest you start with. This blend mode works great with our black and white layer and gives it a deeper tone.
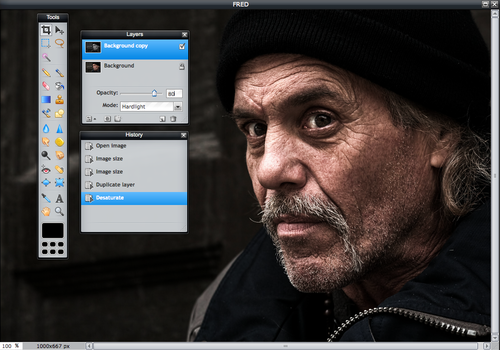
Those are the basics for blending two layers together. As you experiment with these blend modes, you’ll see that you can get some quite good and subtle effects. But what if you want to keep going and not be so subtle? You certainly can.
Going further
We wanted our image to be a little lighter in the face and darker at the edges. We changed the exposure from the Exposure option in Adjustments menu to lighten up the bright areas.
One thing that we add that helps our street portrait look dark and gritty is to use a vignette effect to darken the edges of the photo and put the spotlight on this man’s face. We choose Filter > Vignette and set it at 50%. This made our outside edges darker.
Finally, we aren’t satisfied with how grungy this guy is. More, please! We add a little “noise.” You’ll find the Noise option in the Filter menu. If you ever used to shoot with high speed film, you’ll notice that this noise effect can give you that kind of grainy look that really works great for street scenes.
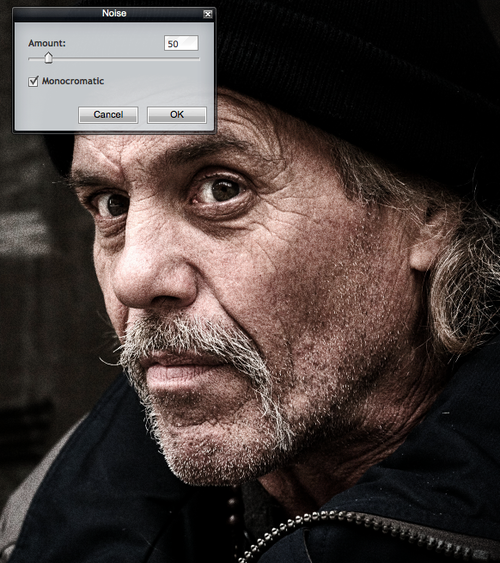
The end result is a pretty grim looking guy, but we like to think he’s a total softie on the inside. Probably just needs a good hug.
