Registrati/Accedi
Prova Premium

Get 40% off Back To School Deal Now!
null
Take your photo editing skills to the next level with Pixlr E - the advanced photo editor designed for professionals and enthusiasts alike.
Open Pixlr Editor

Visit the Pixlr E website (https://pixlr.com/e/) and click on "Open Image" to upload your desired photo from your computer, or select "Create New" to start with a blank canvas. You can also import images from a URL or your social media accounts by clicking on the respective icons.
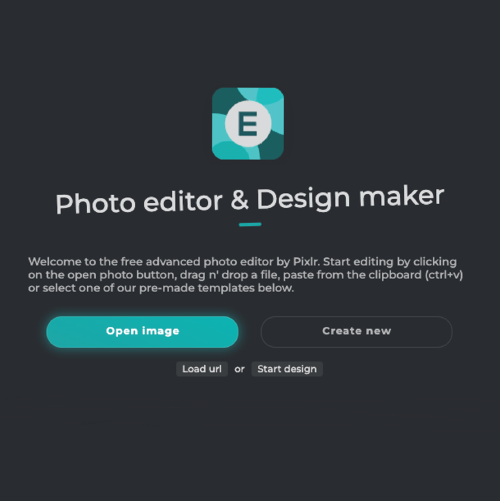
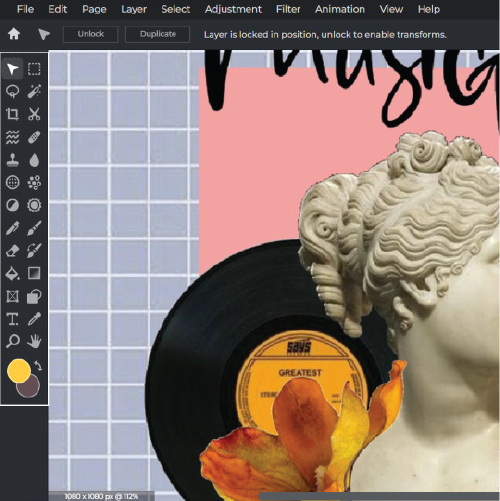
Once your photo is loaded, familiarize yourself with the Pixlr E interface. The toolbar on the left contains all the essential tools like crop, resize, brush, eraser, and more. On the right side, you'll find the layers, history, and properties panels, which give you control over your image editing.
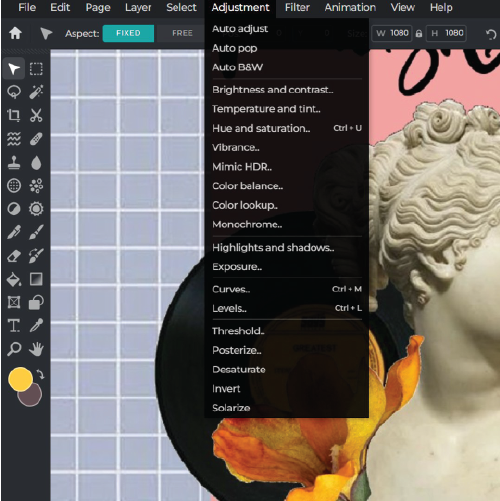
Click on the "Adjustment" tab in the bottom right corner. Here, you can make basic adjustments to your photo such as brightness, contrast, saturation, temperature, and more. Use the sliders to tweak the settings according to your preferences, and click "Apply" to save the changes.
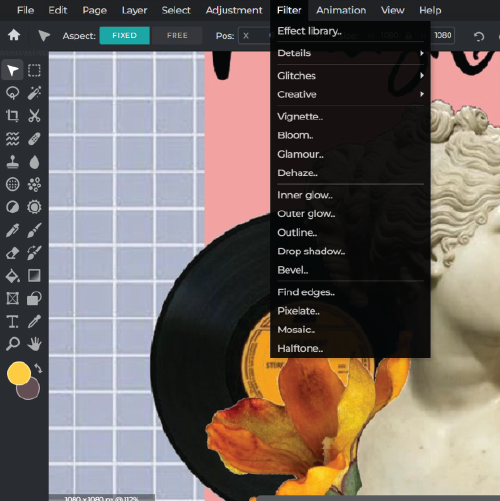
Navigate to the "Filter" tab, also located in the bottom right corner. Browse through the various filters and effects available, such as blurring, sharpening, and artistic effects. Click on a filter or effect to preview it on your image, and use the sliders to adjust the intensity. Click "Apply" when you're satisfied with the result.
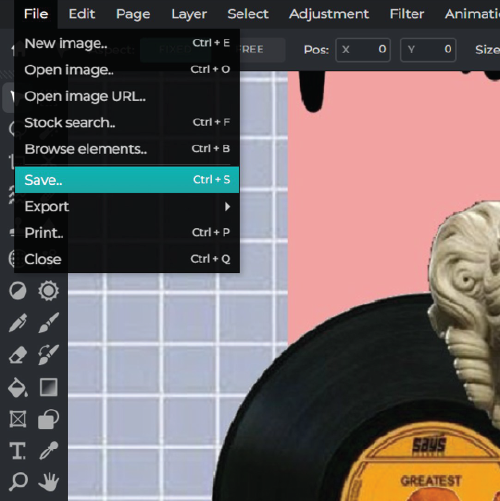
Once you've finished editing your photo, click on the "File" menu in the top left corner, and select "Save" or "Export." Choose the desired file format (JPEG, PNG, or WebP) and adjust the quality settings. Click "Download" to save your edited image to your computer, or share it directly to your social media accounts using the share options provided.
With Pixlr E, you can customize your workspace to suit your needs. Move toolbars, panels, and windows around to create your ideal editing environment.
Explore more popular features from Pixlr
View More ToolsWith Pixlr E, your photos are synced across all your devices. Simply log in to your account on any device, and you'll have access to your photos, ready for editing.
No, there is no limit to the number of devices you can sync with Pixlr E. This allows you to access your photos and projects from any device, anytime, anywhere.
Pixlr E supports a wide variety of file formats, including JPEG, PNG, and many more. This ensures compatibility with your existing image files and allows you to share your work with others easily.
Yes, Pixlr E is fully compatible with touchscreen devices and styluses, providing a seamless and intuitive editing experience across all your devices.
Yes, Pixlr E allows you to create custom presets and filters, which can be saved and applied to future projects with just a few clicks, streamlining your editing process.
Pixlr E offers a comprehensive undo and version history feature, allowing you to easily revert to previous states of your project or compare different edits side by side.
Yes, Pixlr E supports various keyboard shortcuts, allowing you to quickly access and use different tools and features for a more efficient editing experience.
Yes, Pixlr E offers a variety of text and typography tools, allowing you to add and customize text elements in your images, including adjusting fonts, sizes, colors, and more.